Monday:
Wood/Metal Workshop
Processes used – i marked out my grid pattern on my ply and used the power drill using different sized bits to put different holes into the grid. i wanted to create a falling effect so i kept the same horizontal distance between the holes but changed the vertical distances between holes. I used different sized drill bits as a went down the ply to make it look like there was more chaos and disorder as the holes went on.
Output – the bigger drill bits ate at the ply and made it look quite scruffy. It might have been better to use the drop saw to minimise this effect.

Tools available:
Power drill and driver
Band saw
Drill Press
Wednesday:
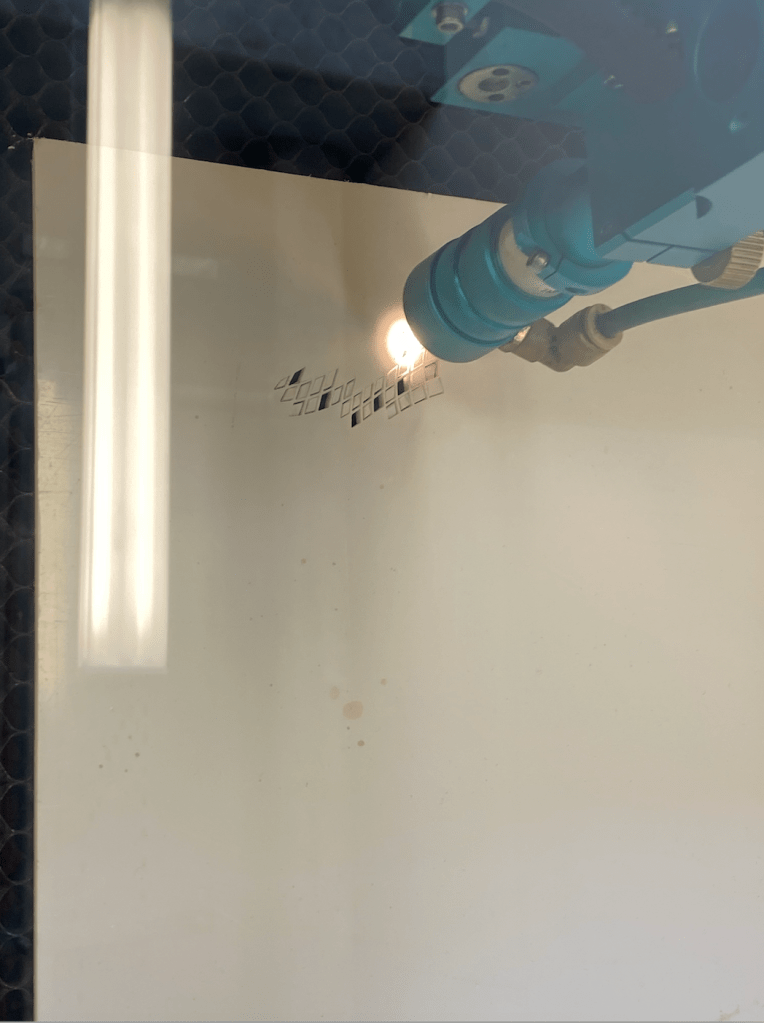
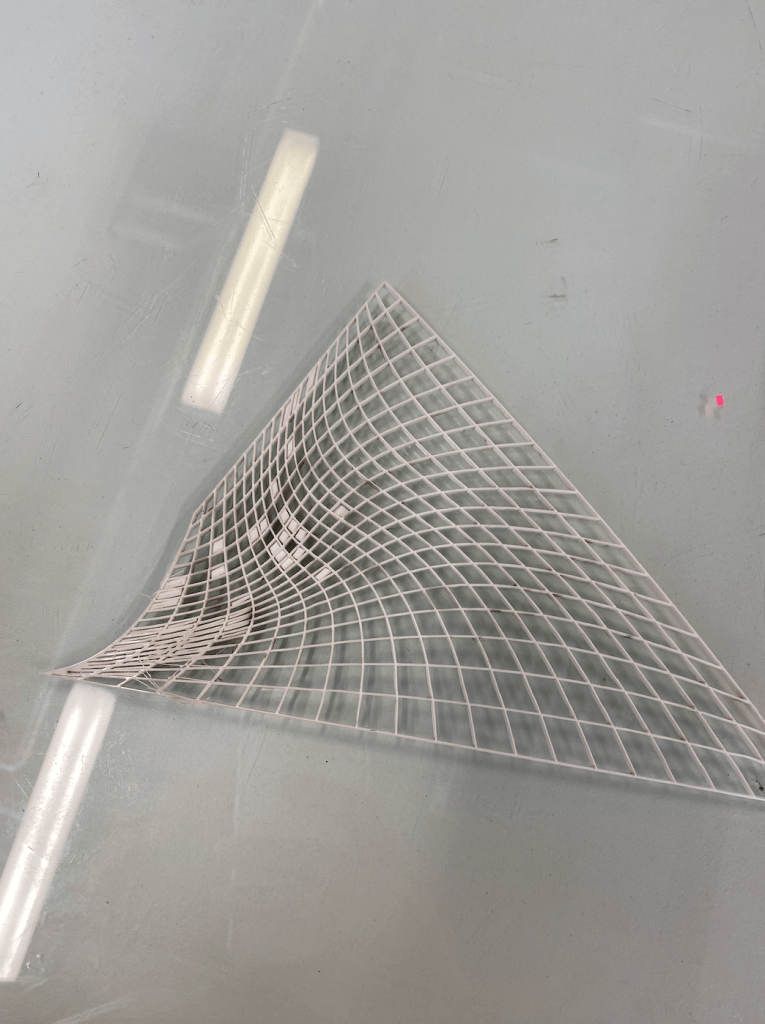
Laser Cutting/Vacuum Forming Workshop
Process used – when creating my grid I played around with warping and twisting the grid lines in illustrator creating the illusion of a twisted piece of material. I then laser cut the warped grid into some white acrylic. In the light, the shadows create a really cool pattern on the surrounding surfaces. The warp makes the material look folded and really cool.
Output – I was really happy with the end result. If I was to do it again I would try and create more movement with the grid.

Tools/ tech available:
Laser Cutter
Vacuum Former
3D Printer
